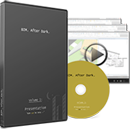
I have stated many times on this website that using good custom texture images for your Revit materials will greatly enhance your renderings, elevations, and overall presentations. It is one of the main points in multiple chapters of BIM After Dark Volume 1. So what do you do if you find and awesome image of the material you are looking for but it is not seamless??
If you are not sure what I mean by "seamless" here are two examples...
 |
| This is a textures that is NOT seamless... Notice how you can see where the image repeats itself... |
 |
| This is a seamless texture... Notice how you cannot tell where the image repeats itself... |
I was going to make my own tutorial for this topic but I thought re-posting the actually video I used to learn this technique would be more than enough. In fact, I wouldn't have said it better myself.
The following video is excerpted from 3DMotive.com:
The following video is excerpted from 3DMotive.com:
Now, How do I use them in my Model?
Now that you know how to make custom seamless materials.... You need to learn how to utilize them in your models. The ability to take texture images, create bump maps, alphas, cutouts, etc... and apply them to your model is what will help you make the most photo-realistic renderings you've ever made.
Want to Learn More?
 Additionally, I go through the entire process in depth within my video tutorial series "BIM After Dark - Volume 1". For example, check out this awesome tutorial to really make your glass material bump!


